Pocket Door Guide Installation: A Comprehensive Guide (Updated 03/31/2026)
Rediscovering a classic, pocket doors are gaining popularity for space-saving design, after a decline following their Victorian-era prominence and a shift towards hinged doors․

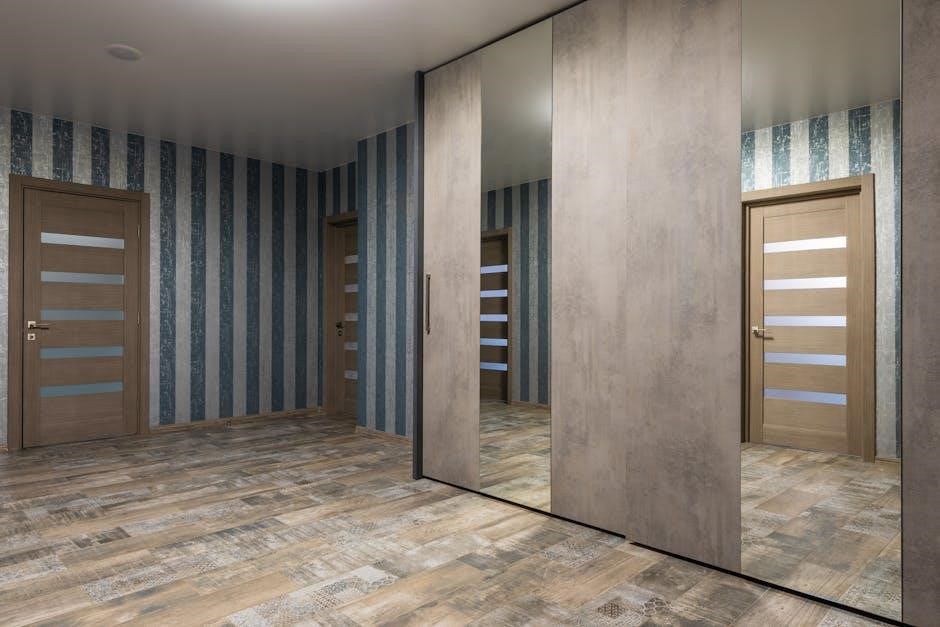
Pocket doors, also known as sliding doors, offer a unique and space-saving solution for interior doorways․ Unlike traditional hinged doors that swing open and require clearance space, pocket doors disappear into the wall cavity when open, maximizing usable floor area․
Historically favored in Victorian architecture, these doors experienced a decline in popularity around the 1920s with the rise of hinged door designs․ However, a recent resurgence in interest, driven by a desire for efficient space utilization and distinctive design elements, has brought pocket doors back into the forefront of modern home renovation and construction․
This guide provides a comprehensive overview of pocket door installation, covering everything from selecting the right system to troubleshooting common issues, ensuring a successful and aesthetically pleasing outcome․
Benefits of Installing a Pocket Door
Pocket doors offer numerous advantages over traditional swinging doors, making them an increasingly popular choice for homeowners․ The primary benefit is space saving; they eliminate the need for door swing clearance, ideal for smaller rooms or high-traffic areas․
Beyond functionality, pocket doors contribute to a cleaner, more streamlined aesthetic․ Their ability to disappear into the wall creates a more open and spacious feel․ They can also enhance accessibility, offering a good option for individuals with mobility challenges․
Furthermore, pocket doors can add a touch of architectural interest and character to a home, harking back to the elegance of Victorian design while providing modern convenience․
Types of Pocket Door Systems
Pocket door systems aren’t one-size-fits-all; they come in configurations to suit different needs and spaces․ Single pocket door systems are the most common, utilizing a single door that slides into a cavity within the wall․ These are best for standard doorways and offer a simple installation process․
Double/Bi-Parting pocket door systems, however, employ two doors that meet in the middle and slide into separate cavities․ This configuration is ideal for wider openings, providing a grander entrance and maximizing the opening space when both doors are retracted․
Choosing the right system depends on doorway width, desired aesthetic, and structural considerations․
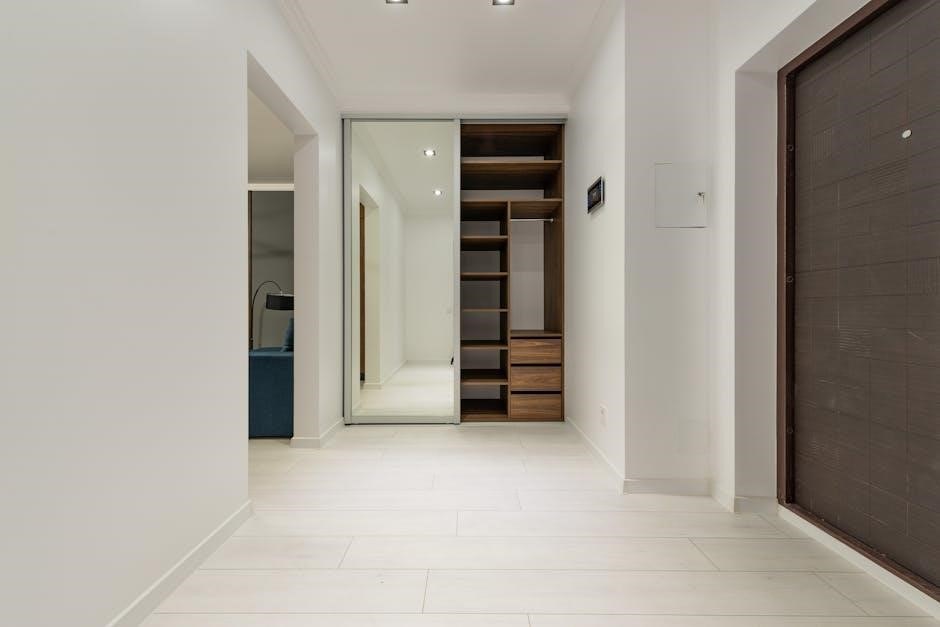
Single Pocket Door Systems
Single pocket door systems represent the most straightforward approach to space-saving doorways․ They consist of a single door panel that smoothly slides into a prepared cavity within the wall, disappearing completely when open․ This simplicity translates to easier installation, making them a popular choice for DIY enthusiasts and renovation projects․
These systems are particularly well-suited for standard-sized doorways, offering a clean and minimalist aesthetic․ The hardware typically includes a track system, rollers, and guides to ensure smooth and quiet operation․ Careful consideration should be given to the wall cavity depth to accommodate the door panel fully․
Double/Bi-Parting Pocket Door Systems
Double or bi-parting pocket door systems offer a grander solution for wider openings, utilizing two door panels that meet in the middle and slide into separate cavities within the wall․ This configuration is ideal for creating a spacious transition between rooms, or for concealing larger openings like those leading to pantries or home offices․
Installation is more complex than single systems, requiring precise alignment and synchronization of the two doors․ Specialized hardware is essential to ensure smooth, coordinated movement․ These systems demand greater wall cavity depth to accommodate both panels simultaneously, and careful planning is crucial for optimal functionality․
Tools and Materials Required
Successful pocket door installation demands a comprehensive toolkit․ Essential tools include a stud finder, level, measuring tape, drill, screwdriver set, and a circular saw or hand saw for precise cuts․ A jamb saw proves invaluable for trimming door jambs․ Materials encompass the pocket door frame kit – including tracks, rollers, and jambs – the door itself, shims, drywall screws, and wood screws․
Don’t forget finishing materials like drywall compound, tape, and paint to seamlessly integrate the door into the wall․ Safety gear, such as safety glasses and dust masks, are paramount․ Having these readily available streamlines the process and ensures a professional finish․
Preparing the Door Frame Opening
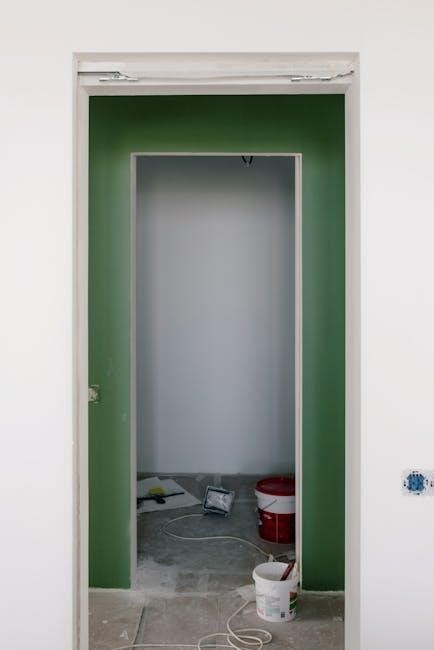
Proper opening preparation is crucial for a smooth installation․ Begin by carefully measuring the height and width of the existing door frame opening, ensuring accuracy for the pocket door frame kit․ If an existing door and trim are present, meticulously remove them, taking care not to damage the surrounding drywall․
Inspect the framing for squareness and structural integrity․ Any necessary repairs, like reinforcing studs, should be addressed before proceeding․ Clear the opening of debris and ensure a clean, level surface for the new pocket door frame․ This foundational step guarantees proper alignment and functionality․
Measuring and Marking the Opening
Precise measurements are paramount for a successful pocket door installation․ Start by measuring the rough opening’s height, width, and depth at multiple points to identify any inconsistencies․ Account for the thickness of the new door and the pocket door frame components when calculating the required opening size․
Clearly mark the header and jamb locations using a level and pencil․ Double-check all measurements before making any cuts or modifications to the existing framing․ Accurate marking ensures the pocket door frame fits snugly and operates smoothly within the prepared opening, preventing future issues․
Removing Existing Trim and Door (if applicable)
Carefully remove existing door trim using a utility knife to score along the paint line, preventing damage to the wall․ Gently pry the trim away from the wall using a pry bar and hammer, working slowly to avoid splintering the wood․ Once the trim is removed, detach the existing door from its hinges․
Inspect the underlying framing for damage or irregularities․ Address any issues, such as warped studs or loose connections, before proceeding with the pocket door installation․ A clean and structurally sound opening is crucial for a properly functioning pocket door system․
Installing the Pocket Door Frame
Begin by carefully assembling the frame components according to the manufacturer’s instructions․ Typically, this involves connecting the header, jambs, and track using screws or nails․ Ensure all connections are secure and flush, creating a rigid and stable frame structure․
Position the assembled frame within the prepared opening, ensuring it’s centered and aligned with the surrounding wall․ Crucially, verify the frame is perfectly level and plumb using a spirit level․ Shims may be necessary to achieve proper alignment, especially if the opening isn’t perfectly square․
Assembling the Frame Components
The initial step involves carefully unpacking and identifying all frame pieces – typically a header, two jambs (side pieces), and the track system․ Refer to the manufacturer’s diagrams for correct orientation of each component․ Most systems utilize screws for assembly, offering a secure and adjustable connection․
Begin by attaching the track to the header, ensuring it’s centered and properly aligned․ Then, connect the jambs to the header and track, forming the rectangular frame․ Pre-drilling pilot holes can prevent wood splitting, especially with hardwood frames․ Double-check all screws are tightened, creating a robust and square structure․
Ensuring Frame is Level and Plumb
Achieving a perfectly level and plumb frame is crucial for smooth door operation․ Use a spirit level to check both vertical jambs and the horizontal header․ Shim as needed between the frame and the wall studs to correct any imperfections․ Plumbness, verifying vertical alignment, is equally important; adjust shims accordingly․
Secure the frame to the wall studs using screws driven through the jambs into the studs․ Regularly re-check level and plumb as you add fasteners․ A slightly out-of-square frame will cause binding and operational issues, so meticulous attention to detail at this stage is vital for a successful installation․
Hanging the Door
Carefully lift the door and align it with the opening, preparing to attach it to the guides within the pocket door frame․ Most systems utilize rollers that fit into a track at the top of the frame, and sometimes a guide at the bottom․ Ensure the rollers are properly seated within the track before releasing the door’s weight․
Initial placement is key; the door should move freely without binding․ Temporary supports can be used to hold the door while adjustments are made․ Precise hanging guarantees smooth gliding and prevents future operational problems, making this a critical step in the installation process․
Attaching the Door to the Guides
Securely fasten the door to the rollers or guides, typically using screws provided with the pocket door kit․ Double-check the manufacturer’s instructions for specific guidance on screw placement and torque settings to avoid damaging the door or the hardware․ Proper attachment is vital for supporting the door’s weight and ensuring smooth, reliable operation․
Inspect the connection points to confirm a firm hold․ Any looseness can lead to sagging or misalignment․ Consider using shims if necessary to achieve a flush fit and prevent wobbling․ A well-attached door is the foundation for a functional and aesthetically pleasing pocket door system․
Adjusting Door Height and Alignment
Fine-tune the door’s height using the adjustable rollers or hardware within the pocket door frame․ Slight adjustments can eliminate scraping against the floor or header․ Check for even gaps around the door’s perimeter when closed; uneven gaps indicate misalignment․
Utilize the adjustment screws on the rollers to raise or lower the door incrementally․ Ensure the door swings freely and smoothly within the pocket․ Address any binding or resistance by making small adjustments until optimal operation is achieved․ Precise alignment is crucial for a seamless and functional pocket door․

Installing the Door Track and Hardware
Securely attach the track to the header of the door frame, ensuring it’s perfectly level and aligned․ Use appropriate screws designed for the header material to guarantee a robust hold; Install the rollers onto the door itself, following the manufacturer’s instructions precisely․
Carefully lift the door and engage the rollers into the track․ Verify smooth movement along the entire track length․ Install any included guides or bumpers to prevent the door from derailing or impacting the frame․ Proper hardware installation is vital for effortless and reliable pocket door operation․
Installing the Door Pull and Lockset
Select a door pull that complements the door’s style and provides a comfortable grip․ Mark the desired location for the pull, ensuring it aligns with the door’s design and functionality․ Drill pilot holes before installing screws to prevent splitting the wood․
Install the lockset, if desired, following the manufacturer’s instructions․ Consider privacy lock options or latch mechanisms for added security․ Test the pull and lockset to ensure smooth operation and secure engagement․ These finishing touches enhance both the aesthetics and usability of your pocket door․
Addressing Common Installation Challenges
Uneven floors or walls can complicate installation; shimming the frame is crucial for achieving a level and plumb installation․ Carefully assess the opening and use appropriate shims to compensate for irregularities․ Smooth door operation can be hindered by misaligned tracks or binding points․
Adjust the door guides and track to ensure effortless gliding․ Lubricate the track with silicone spray to reduce friction․ Persistent issues may require fine-tuning the frame or door alignment․ Addressing these challenges ensures a functional and aesthetically pleasing pocket door;

Dealing with Uneven Floors or Walls
Uneven surfaces are common in older homes and present a significant challenge during pocket door installation․ Accurate assessment is key; use a level to identify discrepancies in both the floor and wall surfaces․ Wood shims become invaluable tools, strategically placed between the frame and the rough opening․
Carefully shim both the floor and wall sides, ensuring the frame is perfectly plumb and level․ Avoid over-shimming, which can create instability․ Secure the shims with construction adhesive for a lasting solution․ Addressing these imperfections guarantees smooth door operation and prevents future issues․
Ensuring Smooth Door Operation

Smooth gliding is the hallmark of a well-installed pocket door․ Proper alignment of the track and rollers is crucial; meticulously check that the door moves freely within the frame․ Lubrication of the track and rollers with silicone spray significantly reduces friction and noise․ Adjust the door height using the adjustable rollers, ensuring consistent contact with the track․
Test the door repeatedly, opening and closing it to identify any binding points․ Fine-tune adjustments as needed, prioritizing a seamless and effortless movement․ Regular maintenance, including cleaning and lubrication, will preserve optimal performance for years to come․
Pocket Door Guide Maintenance
Regular maintenance extends the lifespan and ensures smooth operation of your pocket door․ Periodically clean the track with a vacuum and damp cloth to remove dust and debris, preventing buildup that causes friction․ Lubricate the rollers and track every six months with silicone spray – avoid oil-based lubricants which attract dust․
Inspect the door for any signs of wear or damage, addressing issues promptly․ Tighten any loose screws on the track, frame, or hardware․ Check the door’s alignment and adjust as needed․ Consistent care prevents costly repairs and maintains effortless functionality․
Troubleshooting Pocket Door Issues
Sticking or slow movement often indicates a dirty or unlubricated track; clean and lubricate as described in the maintenance section․ If the door binds, check for obstructions within the frame or misaligned rollers․ Uneven floors can cause rubbing – shimming the track might be necessary․
Doors that fall off track usually stem from detached rollers or a damaged track system; inspect and repair accordingly․ Rattling sounds suggest loose hardware; tighten all screws․ Persistent issues may require professional assessment to diagnose and resolve complex problems effectively․
Cost Considerations for Pocket Door Installation
Pocket door installation costs vary significantly based on several factors․ A basic single door kit can range from $200 to $500, while more elaborate bi-parting systems may exceed $800․ Labor costs, if hiring a professional, typically add $300 to $800, depending on complexity and location․
Additional expenses include the door itself (ranging from $100 to $600+), trim, hardware (pulls, locks), and potential framing modifications․ DIY installation saves on labor but requires tool investment and expertise․ Overall, expect to spend between $500 and $1500+ for a complete installation․
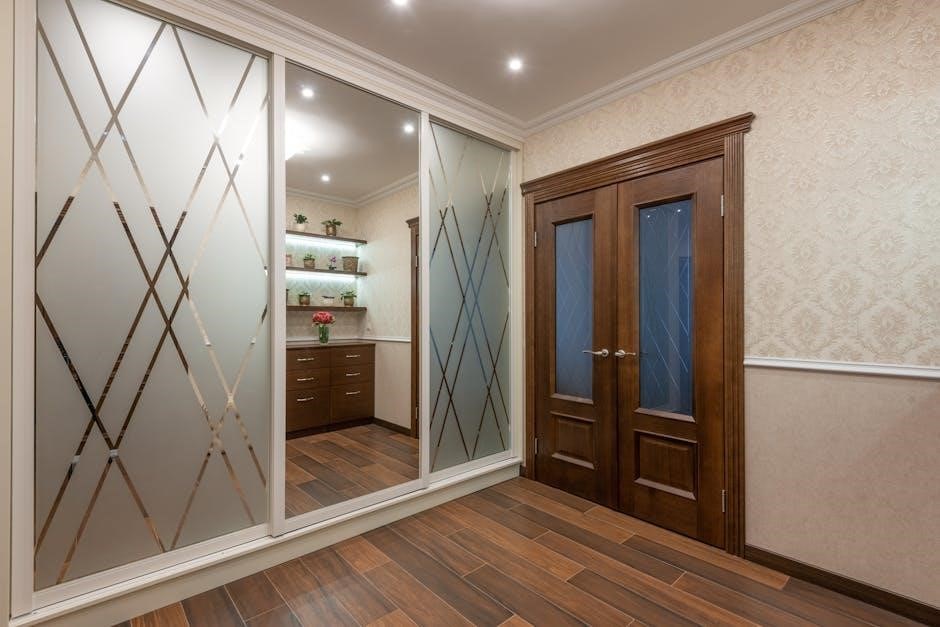
Pocket Door Styles and Design Options
Pocket doors offer diverse aesthetic possibilities, moving beyond purely functional space-saving solutions․ Traditional styles mimic panel doors found in Victorian homes, while modern designs embrace sleek, minimalist aesthetics with frosted glass or solid core options․
Barn door-style pocket doors are increasingly popular, blending rustic charm with convenience․ Customization is key; consider paint or stain to match existing décor․ Hardware choices – pulls, levers, and soft-close mechanisms – further personalize the look․ Glass panels maximize light transfer, enhancing openness․
Safety Precautions During Installation
Prioritize safety throughout the pocket door installation process․ Always wear safety glasses to protect against dust and debris when cutting or drilling․ Use work gloves to prevent splinters and abrasions․ Ensure the power is switched off at the breaker before working with electrical wiring for any integrated lighting or sensors․
Support heavy door components during lifting and maneuvering to avoid strain or injury․ Be mindful of pinch points when assembling the frame and hanging the door․ Follow manufacturer’s instructions carefully regarding weight limits and hardware usage․ Keep the work area clear of obstructions and tripping hazards․
DIY vs․ Professional Installation
Deciding between DIY and professional installation depends on your skillset and comfort level․ DIY offers cost savings but requires carpentry experience, precise measurements, and patience․ Incorrect installation can lead to operational issues or structural problems․ Professionals bring expertise, ensuring accurate fitting and smooth operation, but at a higher cost․
Consider the complexity of your project; a simple replacement is more DIY-friendly than a new wall opening․ Factor in time commitment – professional installation is faster․ Assess your tool inventory; specialized tools may be needed․ Weigh the risks of potential errors against the benefits of professional assurance․
Resources and Further Information
For detailed visual guidance, explore online video tutorials from platforms like YouTube, searching for “pocket door installation”․ Manufacturer websites, such as Johnson Hardware and Stanley, offer comprehensive installation guides and product specifications․ Home improvement retailers – Lowe’s and Home Depot – provide helpful articles and often host workshops․
Consult online forums dedicated to home renovation for troubleshooting advice and shared experiences․ Architectural design websites showcase various pocket door styles and design ideas․ Local building codes should be checked for compliance requirements․ Remember to prioritize safety and consult a professional if unsure about any aspect of the installation process․