
Nail drills, essential tools for technicians, offer precision and efficiency, much like a sculptor’s hammer. This guide explains various drill bits, aiding both beginners and professionals.
Understanding nail drill bits – shapes, uses, sizes – is crucial for aspiring nail techs, ensuring optimal results and client satisfaction with each manicure.
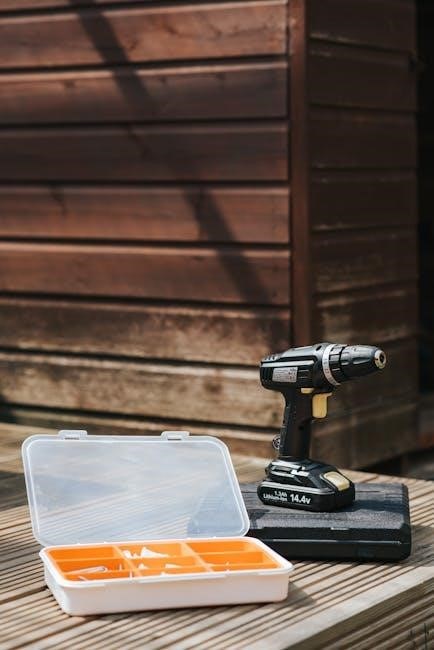
Electric nail files, or nail drills, are professional tools, differing significantly from basic manicure sets, and provide a high-quality experience at home.
What is a Nail Drill and Why Use One?
Nail drills, also known as electric nail files, are powered tools used by nail technicians to shape, smooth, polish, and refine nails. They represent a significant advancement over manual filing, offering increased precision and efficiency. Unlike traditional files, nail drills utilize interchangeable bits rotating at varying speeds.
The benefits of using a nail drill are numerous. They drastically reduce filing time, minimizing discomfort for the client and maximizing productivity for the technician. Drills allow for intricate work, such as cuticle removal and acrylic/gel product refinement, with greater control. They also create a smoother, more consistent finish, enhancing the overall quality of the manicure or pedicure.
Essentially, a nail drill is an indispensable tool, comparable to a sculptor’s hammer, enabling professionals to achieve superior results and offer a wider range of services.
Safety Precautions When Using a Nail Drill
Using a nail drill requires strict adherence to safety protocols to protect both the technician and the client. Always wear appropriate personal protective equipment (PPE), including safety glasses to shield your eyes from dust and debris, and a dust mask to prevent inhalation of nail filings.
Prioritize proper sanitation. Disinfect drill bits thoroughly after each use to prevent the spread of bacteria and fungi. Never work on damaged or infected nails. Maintain a light touch and avoid excessive pressure, as high speeds can generate heat and cause discomfort or injury.
Understand speed control; start with lower speeds and gradually increase as needed. Regularly inspect the drill and bits for any damage. Following these precautions ensures a safe and professional experience.
Types of Nail Drill Bits: Materials
Nail drill bits vary in material – diamond, carbide, and ceramic – each offering unique properties for different nail tasks and technician preferences.
A comprehensive guide to these materials helps professionals select the optimal bit for precise and efficient nail care services.
Diamond Nail Drill Bits
Diamond nail drill bits are renowned for their durability and versatility, making them a staple in many professional nail technician’s collections. These bits feature tiny diamond particles bonded to a metal shaft, allowing for precise and efficient material removal.
They excel at tasks like shaping enhancements, refining cuticle work, and smoothing the nail surface. Diamond bits are generally considered a good all-around choice, suitable for both natural and artificial nails.
However, it’s important to note that diamond bits can be more expensive than other types. Proper maintenance, including regular cleaning and sanitization, is crucial to prolong their lifespan and maintain optimal performance. A guide to proper use ensures longevity.
Carbide Nail Drill Bits
Carbide nail drill bits are known for their aggressive cutting power and are often preferred for quickly removing product, such as acrylic or gel. These bits are made from tungsten carbide, a very hard and durable material.
They are particularly effective for heavy-duty tasks like shortening nails, removing calluses, or quickly shaping enhancements. However, due to their abrasive nature, carbide bits require a skilled hand to avoid damaging the natural nail.
A guide for beginners suggests using lower speeds and gentle pressure. Carbide bits tend to generate heat, so intermittent use and proper cooling are essential. Regular cleaning is vital to remove debris and maintain their cutting efficiency.
Ceramic Nail Drill Bits
Ceramic nail drill bits offer a smoother, less aggressive approach compared to carbide or diamond bits. They are ideal for refining work, smoothing the nail surface, and cuticle work, minimizing the risk of damage to the natural nail.
These bits are crafted from a fired ceramic material, resulting in a finer grit and gentler abrasion. They excel at tasks requiring precision and finesse, like blending acrylic or gel, or polishing the nail plate.
A helpful guide emphasizes that ceramic bits are best used at moderate speeds. They generate less heat than other materials, making them comfortable for both the technician and the client. Consistent cleaning maintains optimal performance.
Nail Drill Bit Shapes and Their Functions
Nail drill bits come in diverse shapes – ball, cone, cylinder, and flame – each designed for specific tasks, from cuticle work to nail preparation and product removal.
Ball-Shaped Bits
Ball-shaped bits are incredibly versatile, making them a staple in any nail technician’s collection. Their rounded form excels at cuticle work, gently pushing back and removing excess skin without causing damage. They’re also fantastic for refining the shape of the natural nail, smoothing out imperfections, and prepping the nail plate for product application.
These bits are particularly useful for addressing areas around the sidewalls and cuticle area where precision is paramount. When using a ball-shaped bit, remember to employ light pressure and a controlled speed to avoid causing discomfort or injury. They contribute to a healthy shine and stimulate nail growth, offering a comprehensive approach to nail care.

Cone-Shaped Bits
Cone-shaped bits are renowned for their precision and are frequently utilized for sculpting and shaping enhancements like acrylic or gel nails. They excel at creating smooth, tapered edges and refining the apex of the nail, contributing to a structurally sound and aesthetically pleasing finish. These bits are also effective for lifting existing product, such as acrylic, during removal procedures.
Different cone angles cater to varying levels of aggression; a shallower angle is ideal for delicate work, while a steeper angle offers more rapid material removal. Employing controlled movements and appropriate speed settings is crucial when using cone-shaped bits to prevent overheating or damage to the natural nail.
Cylinder-Shaped Bits
Cylinder-shaped bits are versatile tools primarily used for smoothing surfaces and refining the shape of nails. They are particularly effective for blending acrylic or gel enhancements, ensuring a seamless transition between the product and the natural nail. These bits are also valuable for reducing thickness and creating a uniform surface texture, preparing the nail for further decoration or finishing;
Available in various grit levels, cylinder bits allow for customized smoothing. Lower grits are suited for initial shaping, while higher grits deliver a polished finish. Careful control of pressure and speed is essential to avoid creating unwanted heat or gouges in the nail surface.
Flame-Shaped Bits
Flame-shaped bits are designed for precise sidewall shaping and refining the cuticle area. Their tapered form allows technicians to carefully remove excess product or skin without causing damage to the underlying nail plate. These bits excel at creating a clean, sculpted look, particularly when working with acrylic or gel extensions.
Utilizing flame bits requires a delicate touch and controlled movements. They are ideal for smoothing out imperfections and achieving a refined finish around the cuticle. Different grit levels cater to varying levels of material removal, offering versatility for diverse nail enhancement techniques.
Mandrel Bits
Mandrel bits are unique as they don’t perform the work themselves; instead, they act as a holder for sanding bands. These bands, available in various grits, are used for a multitude of tasks, including surface preparation, shaping, and smoothing the nail. The flexibility of the sanding bands allows for work in hard-to-reach areas.
Mandrel bits are incredibly versatile, making them a staple in any nail technician’s collection. Changing the sanding band allows for quick adjustments based on the specific task at hand; They are essential for refining the nail shape and removing product residue efficiently.
Understanding Grit Numbers
Grit numbers indicate a bit’s coarseness; lower numbers are more abrasive for quick removal, while higher numbers offer a finer polish for delicate work.
What Do Grit Numbers Mean?
Grit numbers on nail drill bits represent the size of the abrasive particles – essentially, how coarse or fine the bit is. A lower grit number signifies larger particles, making the bit more aggressive and effective for rapid material removal, like quickly shortening acrylic nails or removing significant product buildup.

Conversely, higher grit numbers indicate smaller, more refined particles. These bits are gentler and ideal for smoothing surfaces, refining shapes, and achieving a polished finish. Think of it like sandpaper: coarse grit for heavy sanding, fine grit for a smooth touch. Understanding this scale is vital for preventing damage to the natural nail and achieving desired results.
Choosing the correct grit is paramount for both safety and efficacy, ensuring a professional and comfortable experience for the client.
Choosing the Right Grit for the Job
Selecting the appropriate grit for each task is crucial for successful nail enhancements. For initial product removal, like lifting acrylics, a lower grit (60-100) efficiently breaks down the material. However, avoid using this grit directly on the natural nail to prevent damage.
Medium grits (120-180) are versatile for shaping, refining, and surface preparation. They strike a balance between removal and smoothing. For delicate work, like cuticle care or smoothing gel polish, opt for higher grits (240 and above).
Always start with a lower grit if significant material removal is needed, gradually increasing the grit for a refined finish. Remember, speed and pressure should be adjusted alongside grit selection for optimal results.

Specific Uses for Different Bits
Nail drill bits excel at cuticle work, acrylic and gel polish removal, and precise nail surface preparation, offering versatility for professional and DIY manicures.
Cuticle Work with Nail Drill Bits
Using nail drill bits for cuticle work requires a delicate touch and the correct bit selection. Flame-shaped or ball-shaped bits, with a finer grit (typically 180-240), are ideal for gently pushing back and removing dead cuticle tissue.
Avoid applying excessive pressure; let the drill do the work. Incorrect technique can cause damage to the nail matrix, leading to discomfort or infection. Focus on smoothing the cuticle area, not aggressively removing live tissue.
Proper cuticle preparation is vital for a long-lasting manicure, preventing lifting and ensuring a clean, polished finish. Regular, careful cuticle maintenance promotes healthy nail growth and a professional appearance.
Always prioritize safety and sanitation when performing cuticle work with a nail drill.
Acrylic Removal Using Drill Bits
Removing acrylic nails with a drill is significantly faster and less damaging than traditional soaking methods, when performed correctly. Carbide bits, particularly cone-shaped or cylinder-shaped, are most effective for this purpose. Start with a coarser grit (around 180) to break down the bulk of the acrylic.
Gradually reduce the grit (to 240 or higher) for smoothing and refining the surface, avoiding excessive pressure to prevent heat buildup and potential nail damage. Work slowly and methodically, ensuring complete removal without gouging the natural nail.
Always finish with a gentle buffing to smooth any remaining residue and prepare the nail for reapplication or further treatment.
Proper technique minimizes damage and promotes healthy nail growth.
Gel Polish Removal with Nail Drill Bits

Gel polish removal using a drill is efficient, but requires a delicate touch to protect the natural nail. Utilize a ceramic or diamond bit with a medium grit (around 180-240) to carefully break the seal of the gel polish.
Avoid applying excessive pressure, as this can generate heat and damage the nail plate. Work in light, sweeping motions, gradually removing the gel layer by layer. A cone-shaped bit is often preferred for precise removal around the cuticle area.
Once the bulk of the gel is removed, refine with a finer grit bit for a smooth finish, preparing the nail for reapplication or hydration.
Gentle technique is key to preserving nail health.
Nail Surface Preparation
Proper nail surface preparation is vital for long-lasting enhancements. Begin with a medium grit (180-240) carbide or diamond bit to gently remove shine and create texture for optimal product adhesion.
Employ light pressure and consistent, even strokes, focusing on the entire nail plate. Avoid dwelling in one spot to prevent heat buildup and potential damage. A flame-shaped or ball-shaped bit can effectively reach the sidewalls and cuticle area.
Follow with a finer grit bit to smooth the surface, ensuring a flawless base for gel, acrylic, or polish application. Dust thoroughly to remove debris before proceeding.
A well-prepared surface guarantees a durable and beautiful manicure.
Maintaining and Sanitizing Your Nail Drill Bits
Nail drill bit cleanliness is paramount for hygiene. Thorough cleaning after each client, followed by proper storage, extends bit life and prevents cross-contamination.
Regular maintenance ensures optimal performance and client safety, safeguarding against infections and maintaining professional standards.
Cleaning Procedures
Effective cleaning is vital after every client to prevent cross-contamination and maintain tool longevity. Begin by removing visible debris with a brush – an old toothbrush works wonderfully! Next, submerge the nail drill bit in a disinfectant solution approved for salon use, ensuring complete coverage.
Follow the disinfectant’s instructions regarding contact time; typically, this ranges from 10 to 20 minutes. After disinfecting, thoroughly rinse the bit under running water to remove any residual chemicals. Finally, allow the bit to air dry completely on a clean towel before storing it.
Avoid using abrasive cleaners or harsh chemicals, as these can damage the bit’s surface. Ultrasonic cleaners are also an excellent option for deep cleaning, reaching areas a brush might miss. Remember, consistent and meticulous cleaning is a cornerstone of professional nail care.
Storage Best Practices
Proper storage safeguards your investment and maintains the hygiene of your nail drill bits. After thorough cleaning and drying, store each bit individually to prevent damage and cross-contamination. Dedicated bit holders or organizers are ideal, keeping them neatly arranged and easily accessible.
Avoid tossing bits loosely into a drawer, as this can cause them to chip or dull. Consider using labeled containers or cases to quickly identify each bit’s shape and grit. Store your bits in a cool, dry place, away from direct sunlight and extreme temperatures.
Regularly inspect your storage containers for cleanliness and replace any damaged organizers. A well-organized storage system not only protects your tools but also streamlines your workflow during services.
Choosing a Nail Drill Bit Set
Nail drill bit sets vary; look for diverse shapes, grits, and materials. Beginner sets offer essentials, while professional sets provide specialized bits for advanced techniques.
What to Look for in a Set
Selecting a nail drill bit set requires careful consideration of its contents and quality. A comprehensive set should include a variety of shapes – ball, cone, cylinder, and flame – to address diverse nail services.
Pay attention to the materials; diamond bits are excellent for shaping and smoothing, while carbide bits excel at precise removal. Different grit levels are also essential, ranging from coarse for rapid removal to fine for polishing.
Ensure the set includes a mandrel with bands for sanding and finishing work. The quality of the bits matters; durable materials prevent breakage and ensure longevity. Finally, consider the case or storage solution provided – a well-organized set simplifies your workflow and protects your investment.
Beginner vs. Professional Sets
Beginner nail drill bit sets typically focus on essential shapes and grits, offering a cost-effective introduction to the tool. These sets often include basic cone, ball, and cylinder bits suitable for cuticle work and gentle filing. They prioritize simplicity and ease of use for those new to electric filing.
Professional sets, however, are far more extensive. They boast a wider range of bit types, materials (diamond, carbide, ceramic), and a broader spectrum of grit numbers for specialized tasks like acrylic or gel removal.
Professional sets also include higher-quality bits designed for durability and consistent performance under frequent use. Investing in a professional set is ideal for technicians offering diverse services.